Setup Eleventy Project for Creating Twitch Scenes


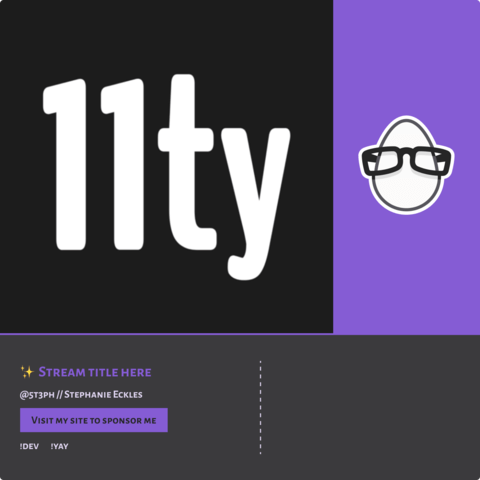
Our Twitch Scenes will use the static site generator Eleventy (11ty) to leverage templating features for creating the scenes. This lesson covers the base project which is available in the project repo under /lessons/00-base.
This lesson includes templating for the stream details and initial styling of the details section within the scene layout. The primary templating language in use is Nunjucks.
Stephanie Eckles: [0:00] To create our Twitch Scenes, we'll be using the static site generator Eleventy. From the course repo on GitHub, you can get the base files, which include Eleventy as part of the package, and a start and build command, where the start will run the project using Browsersync on port 8090, which is important, as we'll learn later.
[0:24] There is one customization to Eleventy, which is to change the input and output directory, so all of your files will live in the src directory. Also, we need it to make it aware of our CSS files, which are located in src/css. Within the src, we have just our index file, and that is currently using the layout of base located in the includes directory. There's not much here yet besides a headline.
[0:52] At this point, we'll go ahead and run the project with npm start so that we can see our changes as we make them. This has launched at localhost:8090, which we can open in our browser, and you'll see just our headline as a starting point.
[1:07] One of the reasons for choosing Eleventy is to be able to create a data file to feed in the details about each stream that we do. That will be located in the data directory, and we'll call it stream.js.
[1:22] Here, we'll include our twitchUsername, prepare to input a title for our stream, an optional description field and the option for a cta, which we're keeping generic for now. In future lessons, we'll learn how to respond to chat commands, but we'll start to list out what we'd like those to be.
[1:40] Now, these details will be available in our template files. We'll move back to includes and our base layout, and we're going to change and prepare for the actual scene content that we'll be using here.
[1:54] For Twitch, the areas that you would like, things such as your screen or your webcam to show in is called a capture area. As a starting point, we'll use a main element to denote where we would like our main scene content to go. Then Eleventy will bring in the variable of content, which means that any future scene content should go in this location.
[2:20] Then we will add a consistent lower third, which will hold those stream details that we just input as data. We'll include this in a header. More specifically, we will have a section element to hold those stream details. Again, in a future lesson, we will also include embedded chat in this area, but for now, we just want those essential stream details.
[2:46] We'll add a place for our stream title, and in Eleventy, we are using Nunjucks for our templating language. We can reference that data just by using the same name as the file we created. We called it stream.js, so off of stream, we will refer to the title.
[3:07] We will follow that up by including our description. I'll duplicate that to include our cta, which we'll change to a strong element. I'll go ahead and give that a class as well, so we can reference that in our styles in a moment.
[3:24] Finally, the comments that we added were inserted as an array. Using Nunjucks, we can loop through those and simply output them as a list. We have a for loop here for each command in our stream.chatCommands. We are going to include the required exclamation mark, which is the Twitch convention to denote a chat command, so that that way, our script can pick it up later.
[3:48] I'll go ahead and save so we can see our progress. We have successfully output all of that information.
[3:53] To wrap up this lesson, we'll go ahead and style this header bar. All of our styles are in css/style.css. The starting point we had given ourselves was just a very cheap CSS reset, which given that this is a tightly controlled project where we are fully in control of everything including the screen resolution, this works for our purposes.
[4:15] We are going to go ahead and add a background-color here of black, because that will represent the actual capture area color that will be used when we bring our scenes into OBS. We'll also ensure that our scene fills the whole screen height, and then using CSS grid, we can set up a grid-template for our rows.
[4:38] This definition means that the first row, which will be the main element in the main capture area, will take up all of the height remaining after the header is allowed to take its natural height.
[4:50] Now, we need to be able to see our text against this black, and probably add a bit of a customized brand color. We're going to use CSS variables for this. We're going to include a surface color, which will be a background color, a primary -- we've picked a Twitch purple -- and then a text color as well.
[5:09] With those ready to go, we'll first of all set our default text color on the body, so that sort of white. Then following that, we can begin to define better our header element that's going to be that lower third. We'll give it a background-color using our surface, set padding, and a border-top using our primary. Here's our progress so far.
[5:31] Another important tip as you're starting to style your scenes is that we're not styling them for whatever your laptop screen resolution is, but rather we are styling them for a 1280x720 resolution. Opening my inspector here, I can toggle on the device toolbar.
[5:49] That allows me to precisely set those dimensions, so I can get a more accurate view of what this is going to look like once we put it in OBS. We've wrapped that whole section in a details class, and we also earlier removed margins from everything. We're going to replace margins by using display: grid with a gap.
[6:07] We're also going to use a magic keyword called fit-content, which basically means only allow this content to grow as wide as it needs to. Then we'll add some styles to our typography element starting with our h1, giving it that color of primary and an updated font size.
[6:23] Then, for that cta that we inserted, we're going to give it a colored background to help it stand out. We'll color it with our primary color and swap the main color, so it remains legible, give it some padding and a slightly bumped-up font-size from the regular text. Our last element to handle for is that list of chat commands.
[6:42] We're going to take off its list-styling and then use display: flex to line those up. With those styles in place, we have a good starting point that we can continue jumping off from to complete our scene styles in the next lesson.

Member comments are a way for members to communicate, interact, and ask questions about a lesson.
The instructor or someone from the community might respond to your question Here are a few basic guidelines to commenting on egghead.io
Be on-Topic
Comments are for discussing a lesson. If you're having a general issue with the website functionality, please contact us at support@egghead.io.
Avoid meta-discussion
Code Problems?
Should be accompanied by code! Codesandbox or Stackblitz provide a way to share code and discuss it in context
Details and Context
Vague question? Vague answer. Any details and context you can provide will lure more interesting answers!