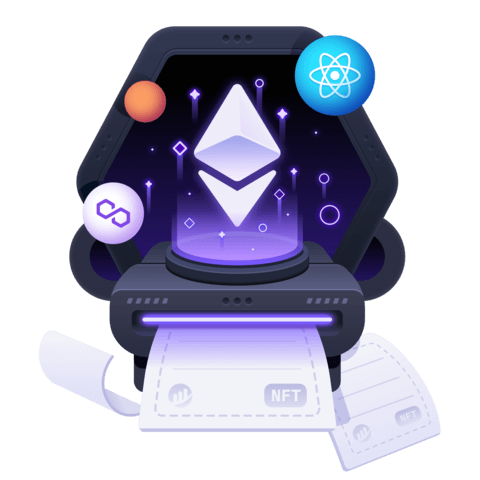
Update an NFT’s Image and Other Metadata


We want to update the “Checked In” property on our NFT tickets once a user checks in with our dApp.
To accomplish this we create checkIn method in our smart contract. To write checkIn we can just copy and paste a large portion of our mint method and remove the call to safeMint, set the id to the user’s token, set Checked In to true, and replace the placeholder image with our IPFS image.
Instructor: [0:00] We're going to update our smart contract to allow users to check-in and change the image on their nft when they do so. The first thing we're going to do is add a new map, mapping. We'll map an address to a Boolean. Make this public. Call it Check-ins.
[0:16] Then we're going to come down below and we'll just add a new function, function check-in, which will receive an address that we'll call Addy. This will be a public function. Inside, we'll say check-ins Addy equals true. Next, let's update our NFT's images.
[0:36] We'll come down to the mint function here. Since we're using images hosted on IPFS, we can remove all of this. Inside the JSON block, we'll update the image field inside of our metadata. We'll change the value to IPFS://the CID number of the image. Let's copy the JSON blob, then these two lines down here as well. We'll paste this into our check-in function.
[1:11] Below, we can remove safe mint because we're no longer minting a ticket, we're just checking one in. Here, we'll use a different CID number to point at our collectable image. Then we'll come above and add a new variable. We'll say UN-256 token ID equals holder token IDs.
[1:34] We'll use the index Addy and we want the first index, so we'll say, zero. In the JSON below, we want to maintain our current token's ID. Let's take this newly created variable and use it below. Instead of using the counter value, we'll just use the token ID here.
[1:51] Then in our traits, we'll find the trait type of checked in right here. We'll actually change the value from false to true because the user has now checked in at our event. If we come back into our terminal, we can redeploy to Rinkeby Testnet. Yarn deploy--network Rinkeby.
[2:12] Once the contract is deployed, we'll head back to our UI. In our UI code, we need to update our environment variable to point out our new contract's address. We also need to get rid of our old ABI file and replace it with our new compiled code.
[2:28] Let's come into our check-in component. We're going to come down below and add a new function, const check-in equals asynchronous function. Inside, we'll add a try block with a catch error. We'll console.log error.
[2:47] Inside the block we'll say, if not connected contract, then return early. Otherwise, we're going to say const check-in transaction equals await connected contract.check-in. We'll pass it our scanned address.
[3:08] Then below we'll say, await check-in transaction.wait. We wait for the transaction to resolve. Above, we'll add a new state variable, const check-in transaction pending, set check-in transaction pending equals useState false.
[3:31] Back in our check-in function we'll say, set check-in transaction pending is true. Then when it resolves, we'll say it's false. We'll do the same thing in our catch block. Lastly, let's add some toast notifications for success and fail.
[3:51] Come down here and paste a toast notification. Instead of buy transaction, this is going to be check-in transaction. Then we'll come down below into the catch block and do the same thing. Except this time the toast will say failed.
[4:05] Let's come down into our markup and wire up the button. We'll say onClick equals check-in. We'll add a loading state, isLoading equals check-in transaction pending.
[4:21] Then if we come back into the browser, go to Settings, and open the sale, we can then go and mint a ticket. Once the transaction is resolved, we can go on our account on Rarible and see our new NFT with our image from IPFS.
[4:42] Then back in our app, let's go to actions, check-in, click Scan QR, quickly scan our Mobile Wallet address, and then click Check-in. We'll confirm that in metamask. We can see the transaction was successful. Let's go back to Rarible.
[5:02] If we refresh the page, we see our new collectible image, that our title still has the same token ID number. Below, in our properties, checked in is set to true.
[5:13] To review, we added a check-in function to our smart contract and changed the image on an NFT when a user checked into the event.


- the Rinkeby url and method you described does not work (the url you mention leads to a 404) so I had to use Goerli instead.
- I get this error when deploying to network: reason: 'insufficient funds for intrinsic transaction cost', code: 'INSUFFICIENT_FUNDS', You inexplicably have funds in your wallet but do not describe how to get them ourselves. I have tried multiple faucets but none distribute enough evidently
This guide from alchemy might help with your error: https://www.alchemy.com/overviews/goerli-faucet
the Rinkeby url and method you described does not work (the url you mention leads to a 404) so I had to use Goerli instead.
I get this error when deploying to network:
reason: 'insufficient funds for intrinsic transaction cost', code: 'INSUFFICIENT_FUNDS',
You inexplicably have funds in your wallet but do not describe how to get them ourselves. I have tried multiple faucets but none distribute enough evidently