
Render an Astro Blog Post Page with getStaticPaths


Now it's time to actually render the contents of our blog. To do this we need to leverage Astro's dynamic pages API because the pages that are rendered depend on what we add to our blog folder.
To do this we'll create a [slug].astro file that will handle rendering the pages. Because all pages are statically generated at build time we will tell Astro to build our pages exporting a getStaticPaths function from this file.
We will utilize getCollection again to grab all the posts in our blog.
In getStaticPaths we need to return an object that has two properties:
- params
- props
Params will be the dynamic portion of the page, in this case the slug of the post. Props will be the data that is passed to that dynamic page, we'll use post.
Each post comes with a render function so we can destructure the Content from the post that we will use in the template of the page.
Challenge
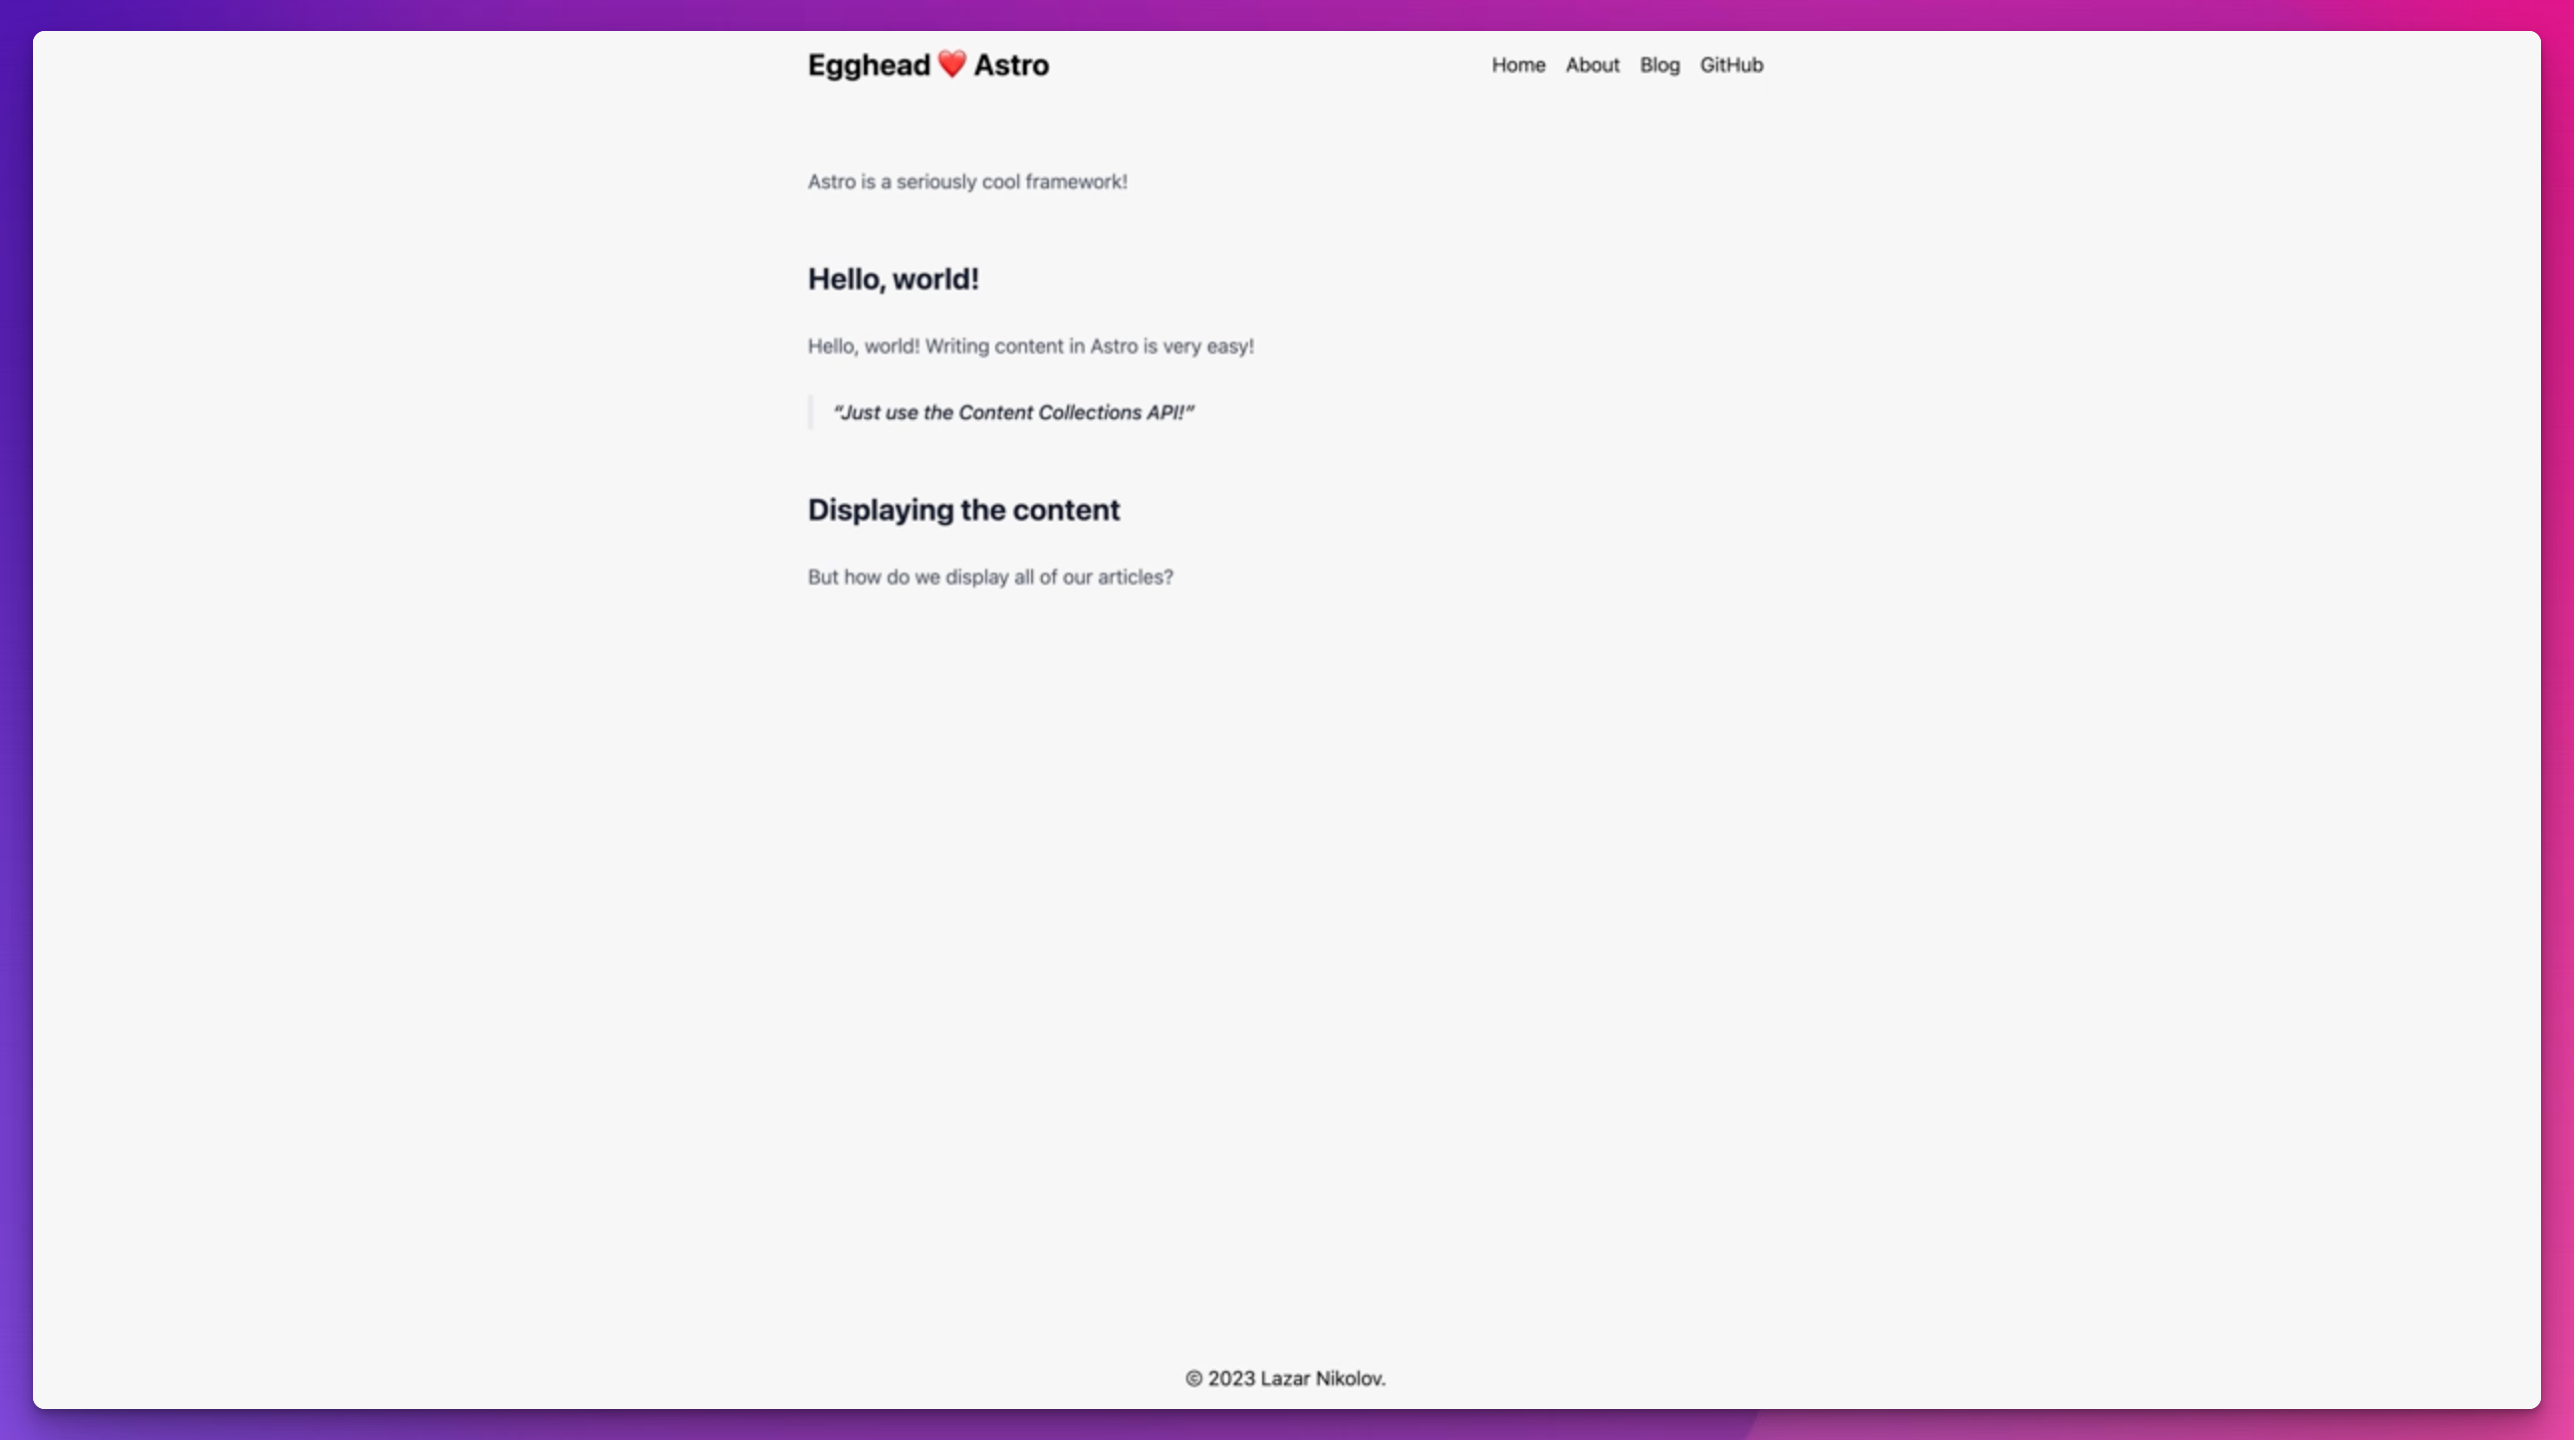
You learned how to render content onto a dynamic blog post page but it doesn't look very good. This is because there are no styles applied to your content. Your challenge is to style the blog post content to look like the screen shot down below.
You can do this by utilizing Tailwinds typography package and use it's prose class or apply your styles with your own CSS. One thing to note is that Content lives in a different scope than the page so any styles you add here will need to be marked as global for Astro to pick them up.
Additionally, blogs typically have an index page of all the blog posts they contain. Add a proper blog index page and utilize the code that we wrote on the home page in the index page. This would be a great time to extract that code into an Astro component to reuse.

Instructor: [0:00] Now, since we have our content system defined, it's time to render each of our POSTs into their own page. Back in lesson 4, we talked about pages in Astro and learned how to create static pages.
[0:12] In this lesson, we're going to learn about dynamic pages and how to further use the content collection's API to render the articles. To define a dynamic page for the blog POSTs, let's create a new file into the pages/blog directory and name it [slug] .astro, but put the slug within square brackets. This indicates to Astro that this page is going to be dynamic. That slug segment is going to change.
[0:40] Since our website is statically rendered by default, we need to export an async function named getStaticPaths. Astro requires us to export this function in pages that we define as dynamic pages. This function must return a list of URLs so Astro can pre-render those pages for us during the build time.
[1:02] In this case, we want a page for each of our blog POSTs. Let's use the getCollection method again to get all of our blog POSTs. We're going to import {getCollection} from 'Astro:content'. We're going to obtain the POSTs, and we're going to loop through the POSTs and return an object that has a params property and a props property.
[1:28] The params property must define the value for the dynamic segment of our page, which is the slug. Inside, we're going to set the slug to post.slug. The props property in this case defines what our page should accept as props. To make it easier for us, we can just pass the POST through the props.
[1:49] With this function, Astro will generate two pages for us, one for the Astro Rocks and one for the "Hello, World!" article. To each of those pages, it's going to pass the POST object respectfully for Astro Rocks and for "Hello, World!" Just like previously, in order to obtain the POST, we can define it as Astro.props.post.
[2:13] Since we don't define the props with an interface now, we need to manually set the type to our POSTs. There's a type called collection entry from the same Astro content package, and we can use this to define the type of the POST.
[2:28] The POST is going to be a collection entry. Since this is a generic type, we need to pass the name of the collection, which is blog. Now, we're going to have types in our POSTs constant.
[2:39] If you remember from earlier, the POST contained a method called render. We can use that render method to generate HTML from the markdown of the POST. To do that, we can destructure the content from post.render and since this returns a promise, we need to await it.
[3:00] Aside from the content, the render method also returns a list of the headings, which we can use to create a table of contents component and also, records of the front matter. Let's start defining the page. We want to use the same layout.
[3:16] Let's also import the layout, layout/layout.astro. Scroll down and we'll use the layout. We'll pass the title. This is where we can get creative. Since we already have the POST, we can say the title is going to be post.data.title. When we open the Astro Rocks, the title of the page is going to be Astro Rocks.
[3:40] Let's keep it simple, inside we can render the article tag and then render the content, which we obtained from the render method. Now, if we click on the articles, we're going to see Astro is amazing. The title is Astro Rocks. We also have the layout. The URL reflects our dynamic route, so /blog/Astro Rocks.
[4:03] We can go back and click on the "Hello, World!" We're going to see the same. The "Hello, World!" article content and also blog/hello world. That's how we can create dynamic pages and use the content collections API to render the content for each of our articles.
[4:20] Let's do a recap now. We created a dynamic page by wrapping the dynamic segment with curly brackets. Since our website is statically rendered. We needed to export a getStatic paths function that told Astro which pages should be pre-rendered.
[4:36] We used the getCollection method again to get all of our POSTs, so we can then return an object for each of them. We then used the render method to process and render the POST markdown into HTML and placed the content component into our page. You might notice that the article isn't correctly styled.
[4:56] We used a couple of headings and a block quote but the output is just plain text. That's because Tailwind normalizes the CSS. We need to explicitly define the styles of the headings, the block quote, and any other element we might use in our POSTs. This is going to be your second challenge. The easiest way is to use Tailwind Typography plugin and add the pros class to the article tag.
[5:20] Alternatively, you can manually define the styles on this page, just like we did back in lesson three. You would have to define the styles as global though because the content component will put the elements into a different scope. Here's how the article page looks like with Tailwind Typography plugin.
[5:37] Additionally, as part of this challenge, you should create a blog index page that uses the proper layout and also uses the content collections API to render a list of the articles just like we did on the home page. And because you're going to be using it on the home page and the blog index page it's a good idea to extract it into a component you can reuse in both pages.
[5:59] Take your time make the necessary changes and proceed to the next lesson. If you get stuck feel free to check the code. The link will be in the description of this lesson.

Member comments are a way for members to communicate, interact, and ask questions about a lesson.
The instructor or someone from the community might respond to your question Here are a few basic guidelines to commenting on egghead.io
Be on-Topic
Comments are for discussing a lesson. If you're having a general issue with the website functionality, please contact us at support@egghead.io.
Avoid meta-discussion
Code Problems?
Should be accompanied by code! Codesandbox or Stackblitz provide a way to share code and discuss it in context
Details and Context
Vague question? Vague answer. Any details and context you can provide will lure more interesting answers!